Support BotPro
The Support Bot is a dedicated help page where customers pick their problem from guided categories before the assistant starts troubleshooting with them.
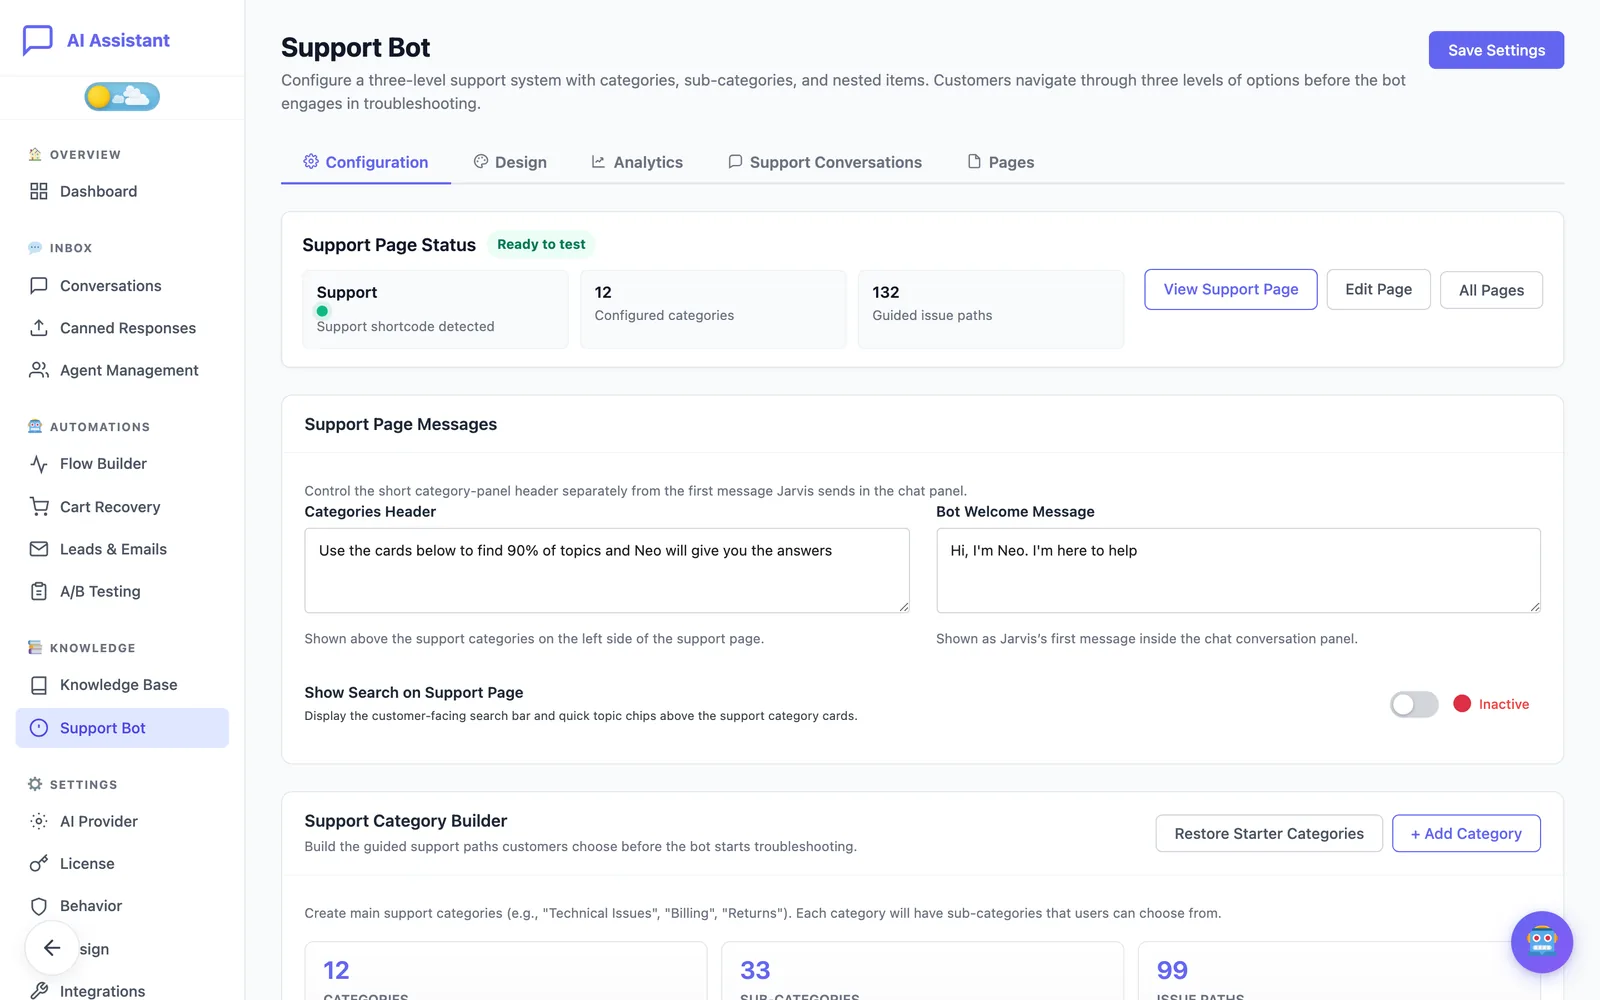
The Support Bot is a Pro feature. You’ll find it under AI Assistant → Knowledge → Support Bot, in five tabs: Configuration, Design, Analytics, Support Conversations and Pages. It is separate from the floating chat widget: it lives on a page of its own, with its own messages, look and limits.
How the support page works
The page has two parts: a panel of category cards and a chat panel. Customers narrow their problem down in three levels, then the assistant takes over with that context:
- A category, such as “Orders & Tracking” or “Returns & Exchanges”.
- A sub-category inside it.
- An issue, the final choice. The screen calls these nested items or issue paths.
Customers can also type their question directly without choosing a card. By default the Support Bot sticks to troubleshooting: it does not suggest products, offer discounts or look up orders unless you allow it.
Build the categories
Start from the ready-made set
- On the Configuration tab, click Install Starter Categories and confirm.
- Review what was added and adapt it to your store.
This installs 12 common store-support categories, each with sub-categories, issues and an icon, from “Shipping & Delivery” and “Payments & Billing” to “Speak to an Agent”. If you already have categories, the button reads Add Missing Categories and only adds the starter categories you don’t have, without touching yours. Restore Starter Categories does the opposite: it replaces every category, sub-category and issue with the starter set, and your own edits are lost.
Create your own
- In Support Category Builder, click + Add Category and give it a name and, if you like, an image.
- Click Edit Sub-Categories on the category, then + Add Sub-Category.
- Click Edit Items on a sub-category, then + Add Nested Item for each issue.
- Drag the rows to put them in the order customers should see.
- Click Save Settings at the top of the page.
The counters above the list show how many categories, sub-categories and issue paths you have.
Write the two messages
- Categories Header: the short text shown above the category cards.
- Bot Welcome Message: the first message in the chat panel.
Show Search on Support Page adds a search bar and quick topic chips above the category cards.
Put it on a page with the shortcode
- Open the Pages tab and click Create New Support Page, or go to Pages → Add New in WordPress.
- Give the page a title, for example “Support”.
- Paste the shortcode into the page content and publish.
[ecomai_chatbot type="support"]On a support page the floating widget is hidden automatically, so customers only see the support experience. Back on the Configuration tab, Support Page Status shows whether a page with the shortcode was found, with View Support Page and Edit Page buttons. The Pages tab lists every page that uses it.
The shortcode accepts optional attributes:
widthandheight: the size of the support area, for example100%and760px.theme:lightordark.color,secondary_colorandbg_color: hex colour codes.
[ecomai_chatbot type="support" width="100%" height="760px"]Leave them out to use the values from the Design tab, which is the normal place to style the page. If your licence is no longer Pro, the shortcode shows nothing to customers.
Give it its own design
The Design tab styles the Support Bot independently of the floating widget. Every field is an override: left empty, it uses the value from your main widget design.
- Design Presets: Cool Cyan, Forest Mint, Amber Warmth and Slate Pro apply a matching palette in one click.
- Theme & Colors: the base theme and the primary, secondary, background and text colours.
- Typography & Shape: font family and square or rounded corners.
- Dimensions: widget width and height.
- Avatar and Footer.
Style Preview is a visual sample; use View Support Page to test the real page. Revert Changes puts the fields back to how they were when you opened the page, and Reset to Global clears every override. Nothing is published until you click Save Settings.
Decide what the Support Bot may do
Under Feature Permissions on the Configuration tab, four switches widen or narrow its scope:
- Allow Product Recommendations: off by default.
- Allow Discounts: off by default. When on, the assistant may offer coupons from the Smart Discount Engine.
- Allow Order Lookup: off by default. When on, the assistant can look up an order from its number and e-mail.
- Allow Escalation to Human Agent: on by default.
Behavior Overrides let the Support Bot differ from the main chat: its own Bot Name, Personality Tone, AI Temperature and a Custom System Prompt Addendum with extra instructions for support conversations. Empty fields use your global settings.
The Support Bot answers from your knowledge base. When you add a snippet there, you can make it apply to the Support Bot only, so detailed troubleshooting steps don’t end up in sales conversations.
How it hands over to a person
With Allow Escalation to Human Agent on, the support page escalates the same way as the chat widget: when a customer asks for a person, or your escalation rules are met, the conversation is passed to your team, who reply from AI Assistant → Inbox → Conversations. The full process is in Agents and human takeover.
- If you turn the switch off, the Support Bot no longer escalates on its own, for example after a long conversation. A customer who explicitly asks for a person is still handed over.
- If escalation is disabled for the whole plugin, nothing is handed over from the support page either.
- The starter set includes a “Speak to an Agent” category. Keep it only if someone is there to answer.
The Support Conversations tab lists the conversations that started on the support page, with the path the customer chose, the status (including Escalated and With agent) and a View link to the full conversation.
Read the analytics
The Analytics tab shows what customers do on the support page over the last 7 or 30 days:
- Totals for tracked events, support sessions, searches, no-result searches and escalations.
- Top Categories by Clicks and Top Issue Paths: what people need help with most.
- Searches With No Results: what customers looked for and did not find. Each one is a candidate for a new issue or a new knowledge snippet.
- Escalations by Category: where the assistant most often needs a person.
These analytics store interaction events such as clicks and searches, not message transcripts. Under Privacy & Retention you choose how long events are kept (30, 60, 90 or 180 days; 90 by default) and click Save Retention. Clear Analytics Data deletes all events permanently and leaves conversations untouched.
Still stuck?
Check the troubleshooting guide, or contact support and tell us what you tried.