Getting started
This guide takes you from a fresh install to a chat widget that answers questions about your store. No coding is needed.
What you need
- WordPress 6.0 or higher and PHP 7.4 or higher.
- WooCommerce 7.0 or higher for the store features (product answers, order lookup, cart recovery). The knowledge base and chat work without WooCommerce.
- An API key from an AI provider. You pay the provider directly for what the assistant uses. The Free plan runs on OpenAI; see AI providers for the other options.
Step 1: install and activate the plugin
- In your WordPress admin, go to Plugins → Add New → Upload Plugin.
- Choose the plugin
.zipfile, click Install Now, then Activate. - A short setup wizard opens the first time. You can follow it or close it and use the steps below; every setting stays editable afterwards.
After activation you’ll find a new AI Assistant item in the WordPress admin menu. The plugin has its own sidebar, grouped into Inbox, Automations, Knowledge and Settings.
If you bought Pro, activate your key now under Settings → License. The steps are in Licence and activation.
Step 2: connect your AI provider
- Open AI Assistant → Settings → AI Provider.
- Under Select Provider, choose your provider.
- Paste your key in the API Key field and click Save Key. The key is stored encrypted in your WordPress database.
- Click Test Connection. When the status shows Connection OK, the assistant can answer.
- Pick a model under AI Model and click Save Settings.
Step 3: give the assistant a name and a voice
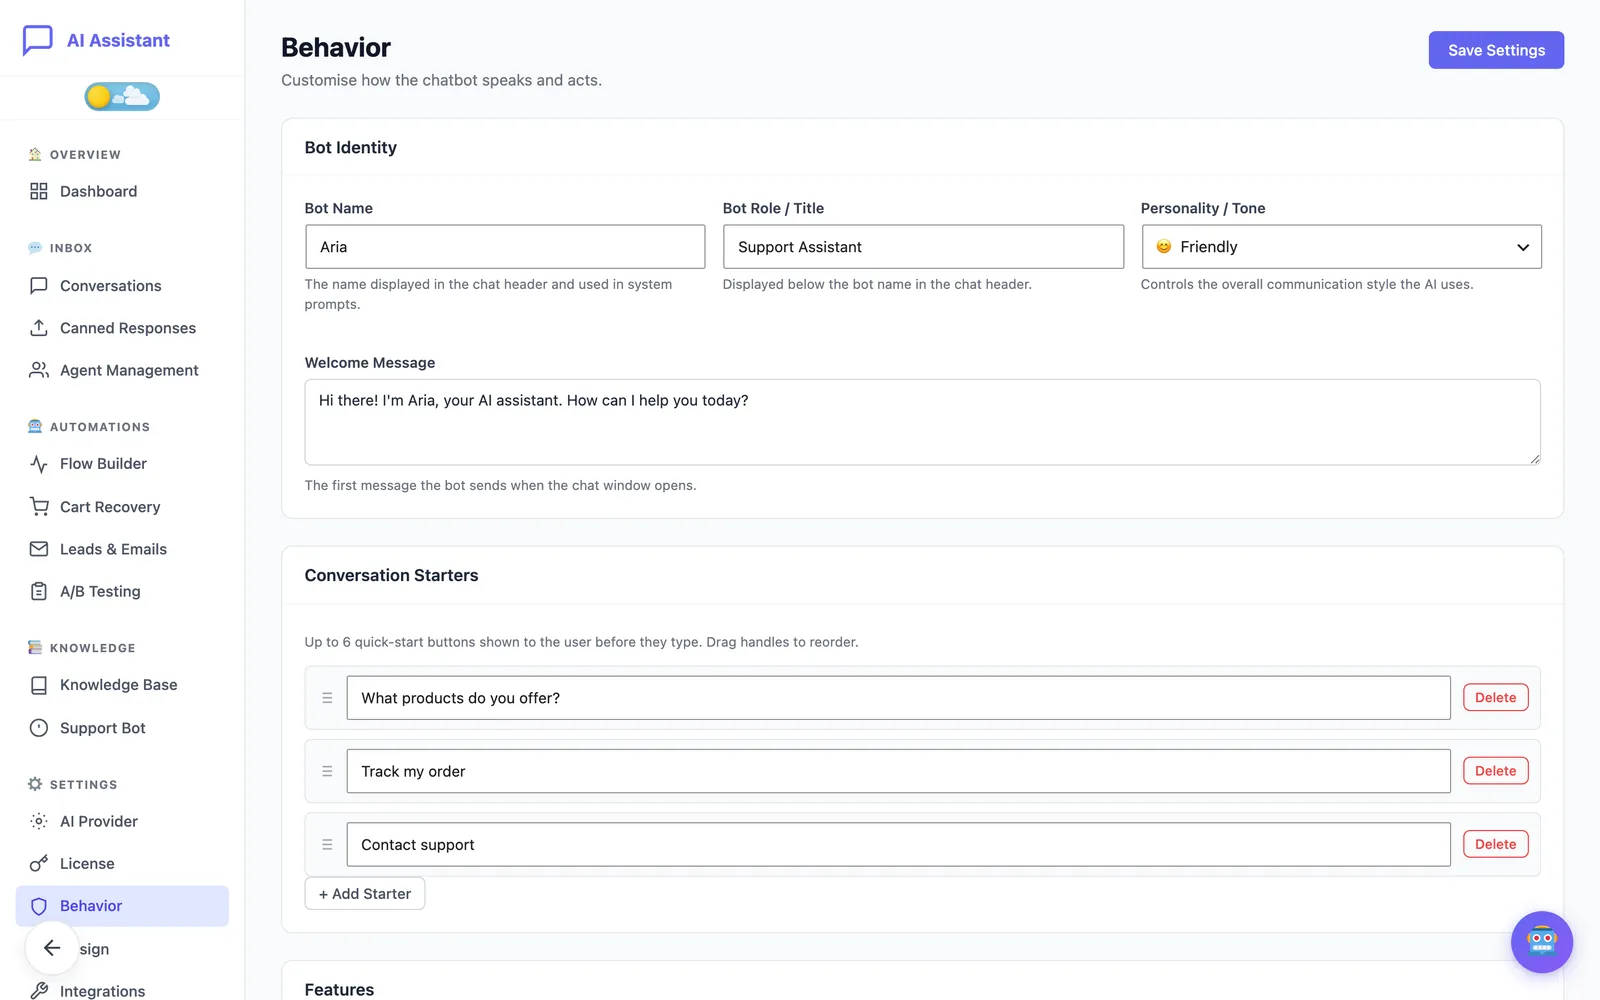
Open Settings → Behavior. In Bot Identity you set:
- Bot Name (the default is Aria) and Bot Role / Title, both shown in the chat header.
- Personality / Tone: Friendly, Professional, Casual, Enthusiastic or Concise.
- Welcome Message: the first message customers see when the chat opens.
- Conversation Starters: up to six quick-start buttons shown before the customer types.
Step 4: add your knowledge
Open Knowledge → Knowledge Base. The fastest start is the Base Knowledge box: write two or three paragraphs about your business, shipping and returns, then save.
From there you can add snippets, upload a PDF, sync your site pages or connect a Google Doc or Sheet. The Knowledge base guide explains each type and the limits of the Free plan.
Step 5: match the widget to your brand
Open Settings → Design, click a preset, adjust the colours and position, and click Save Settings. A live preview shows every change before you publish it. Details are in Widget design.
Step 6: check the widget on your store
- Open your store in a private or incognito window. The widget is not shown to logged-in administrators, so you won’t see it in the browser where you manage WordPress.
- Click the chat bubble and ask a question your knowledge base covers, for example your return policy.
- Go back to Inbox → Conversations in the admin to read the conversation you just had.
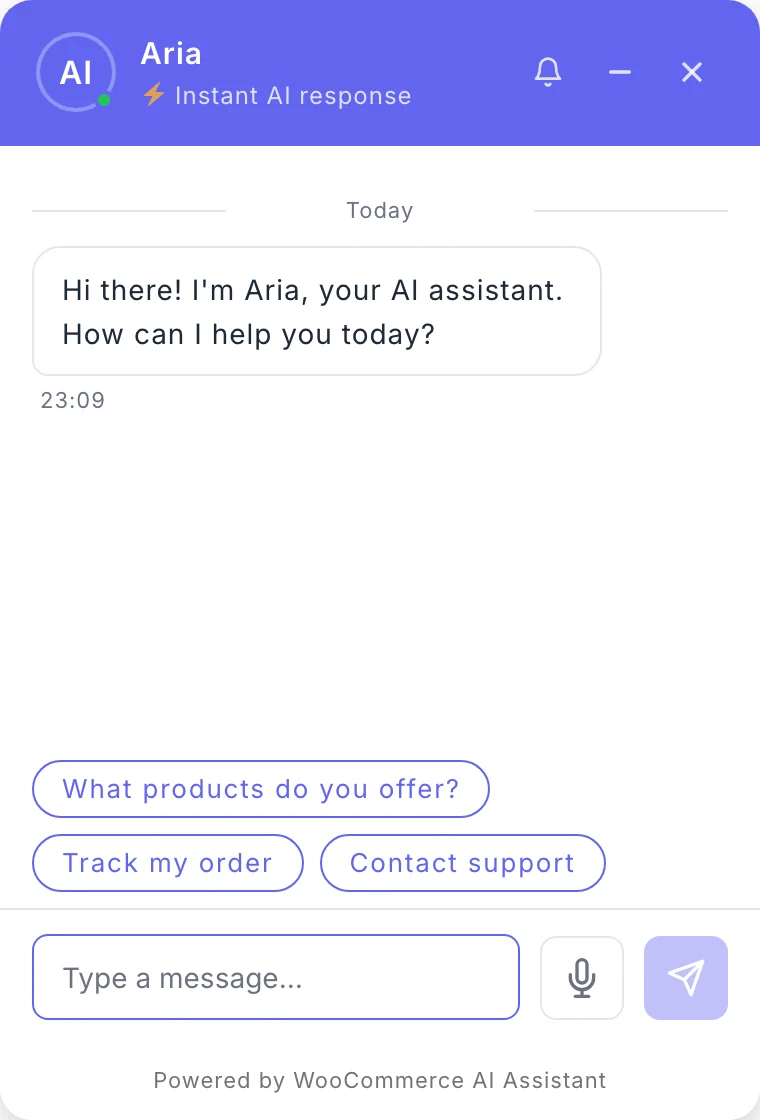
The widget appears on every page by default. You can change that with Auto-Inject on All Pages and Show on Checkout under Settings → Behavior → Features, or place it yourself with the [ecomai_chatbot] shortcode.
Where to go next
- Knowledge base: improve the answers.
- Agents and human takeover: decide what happens when a customer asks for a person.
- Cart recovery Pro: proactive messages and discounts for hesitant shoppers.
- Flow Builder Pro: guided conversations.
- Privacy and GDPR: retention and what is sent to the AI provider.
Still stuck?
Check the troubleshooting guide, or contact support and tell us what you tried.