On this page
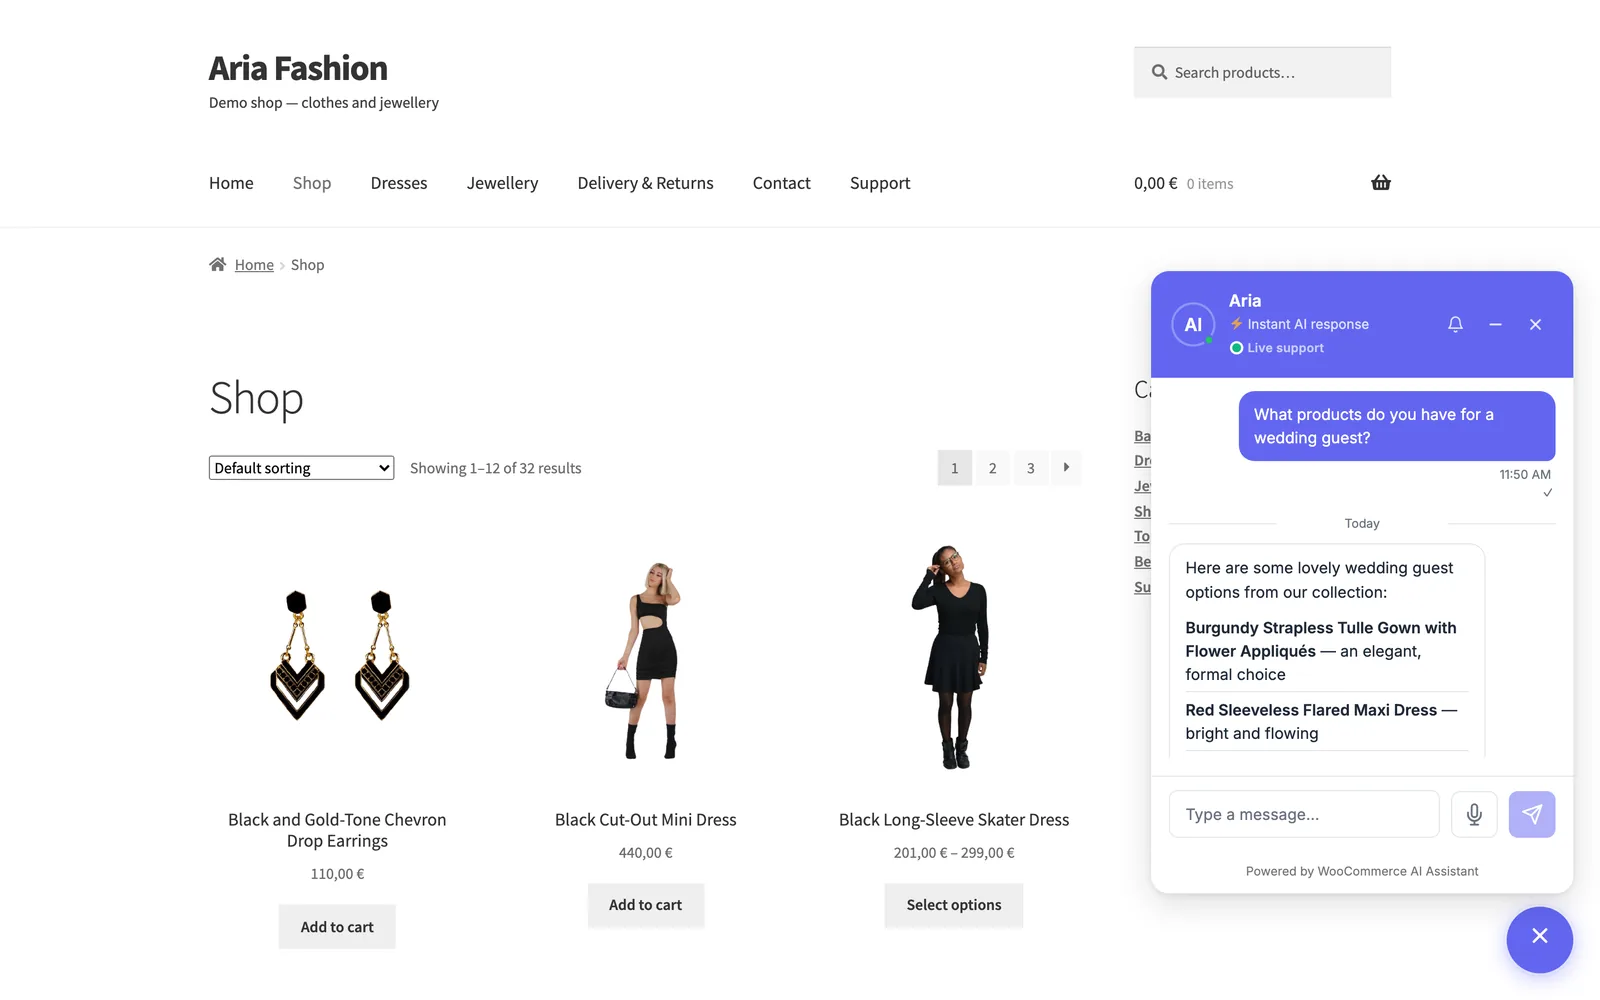
Most questions a shop receives are variations of the same few: Do you ship to Belgium? Is this in stock in blue? How do I return it? Where is my order? An AI chatbot can answer them at 2 a.m. on a Sunday, in the customer’s own words, from your own catalogue and policies.
This guide shows how to add one to a WooCommerce shop with the free E-commerce AI Assistant plugin. No code is needed and the whole set-up takes about 20 minutes.
What an AI chatbot can do for a WooCommerce shop
A rules-based chatbot follows a script: the customer clicks a button, the bot shows a pre-written answer. An AI chatbot reads what the customer actually typed and writes an answer from the information you give it. For a shop, that means it can:
- answer product questions from your live catalogue: prices, stock, variations, descriptions;
- explain your policies: shipping, returns, warranty, payment methods;
- look up an order once the customer confirms the order number and billing e-mail;
- hand the conversation to you when it cannot help, so the customer is never stuck with a bot.
It does not replace you. It takes the repetitive questions off your desk so you can spend your time on the ones that need a person.
What you need before you start
- WordPress 6.0 or later and PHP 7.4 or later.
- WooCommerce 7.0 or later for the shop features (product answers and order lookup). The chat itself also works on a site without WooCommerce.
- An OpenAI API key. The plugin is free, and you pay OpenAI directly for what the chatbot uses. The cost depends on your number of conversations and the model you pick; the plugin includes a cost estimator so you can see the expected monthly cost before you commit.
To get a key, create an account on OpenAI’s platform site, add a payment method and create a key under API keys. Keep it somewhere safe: you will paste it into WordPress in step 2.
Step 1: install the plugin
- In your WordPress admin, go to Plugins → Add New → Upload Plugin.
- Choose the plugin’s .zip file (from the download page), click Install Now, then Activate.
A new AI Assistant menu appears in the admin. A short set-up wizard opens the first time; you can follow it or close it and use the steps below.
Step 2: connect OpenAI
- Open AI Assistant → Settings → AI Provider.
- Choose OpenAI, paste your key in API Key and click Save Key. The key is encrypted before it is stored in your database.
- Click Test Connection. When the status reads Connection OK, the chatbot can answer.
- Pick a model under AI Model and click Save Settings.
Not sure which model to choose? Start with one of OpenAI’s smaller, cheaper models; for shop questions they are fast and accurate enough. Our article on which AI to use for a shop chatbot goes into the trade-offs.
Step 3: give it a name and a tone
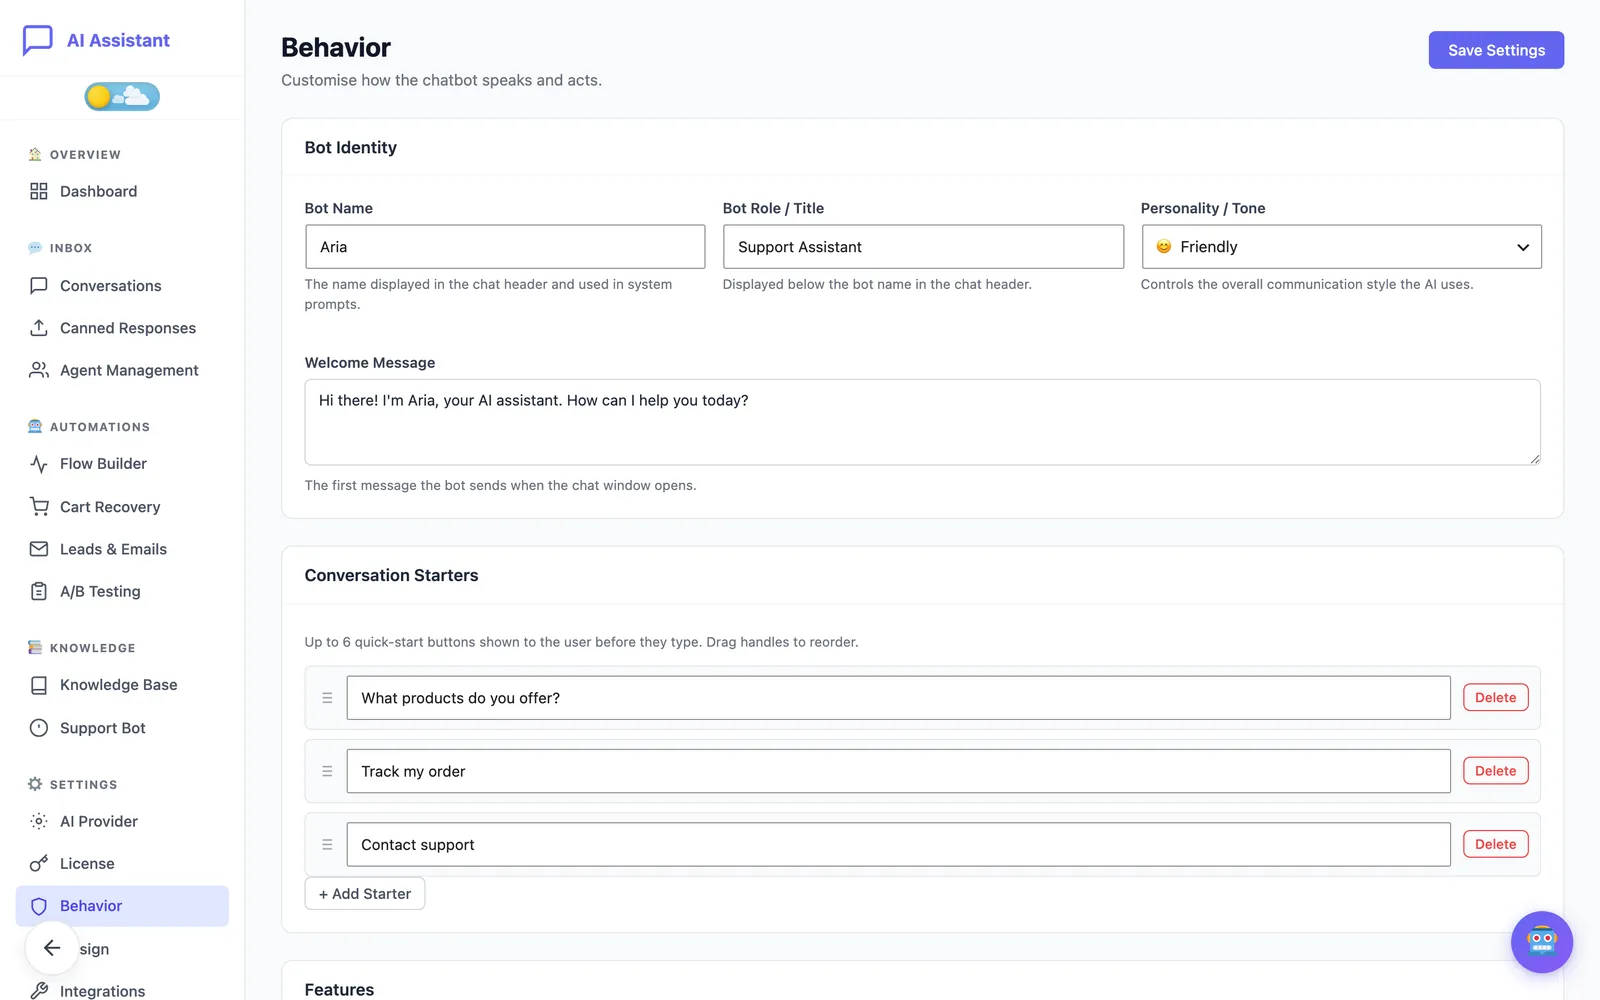
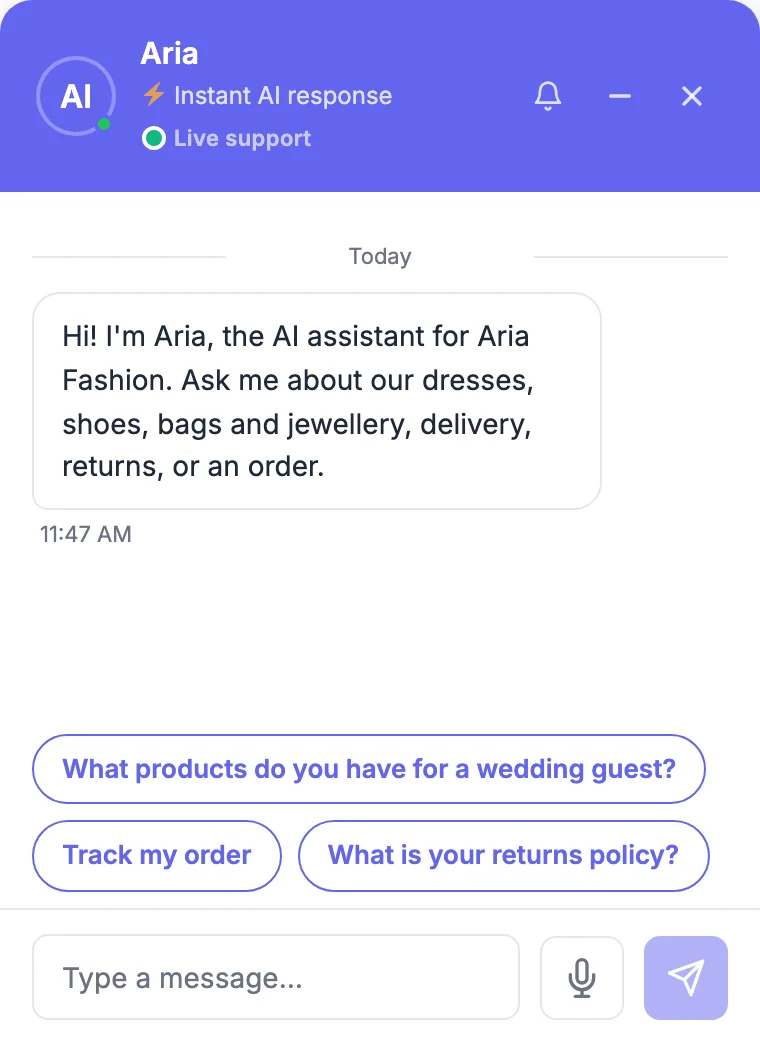
Open Settings → Behavior. Under Bot Identity you set the name shown in the chat header (Aria by default), its role, its tone (friendly, professional, casual, enthusiastic or concise), the welcome message and up to six conversation starters: buttons such as Track my order or Shipping times that customers can click instead of typing.
A short, specific welcome message works better than a generic one. “Hi, I’m Aria. I can help with sizes, delivery and your orders.” tells customers what to ask.
Step 4: teach it about your business
This is the step that makes the difference between a vague chatbot and a useful one.
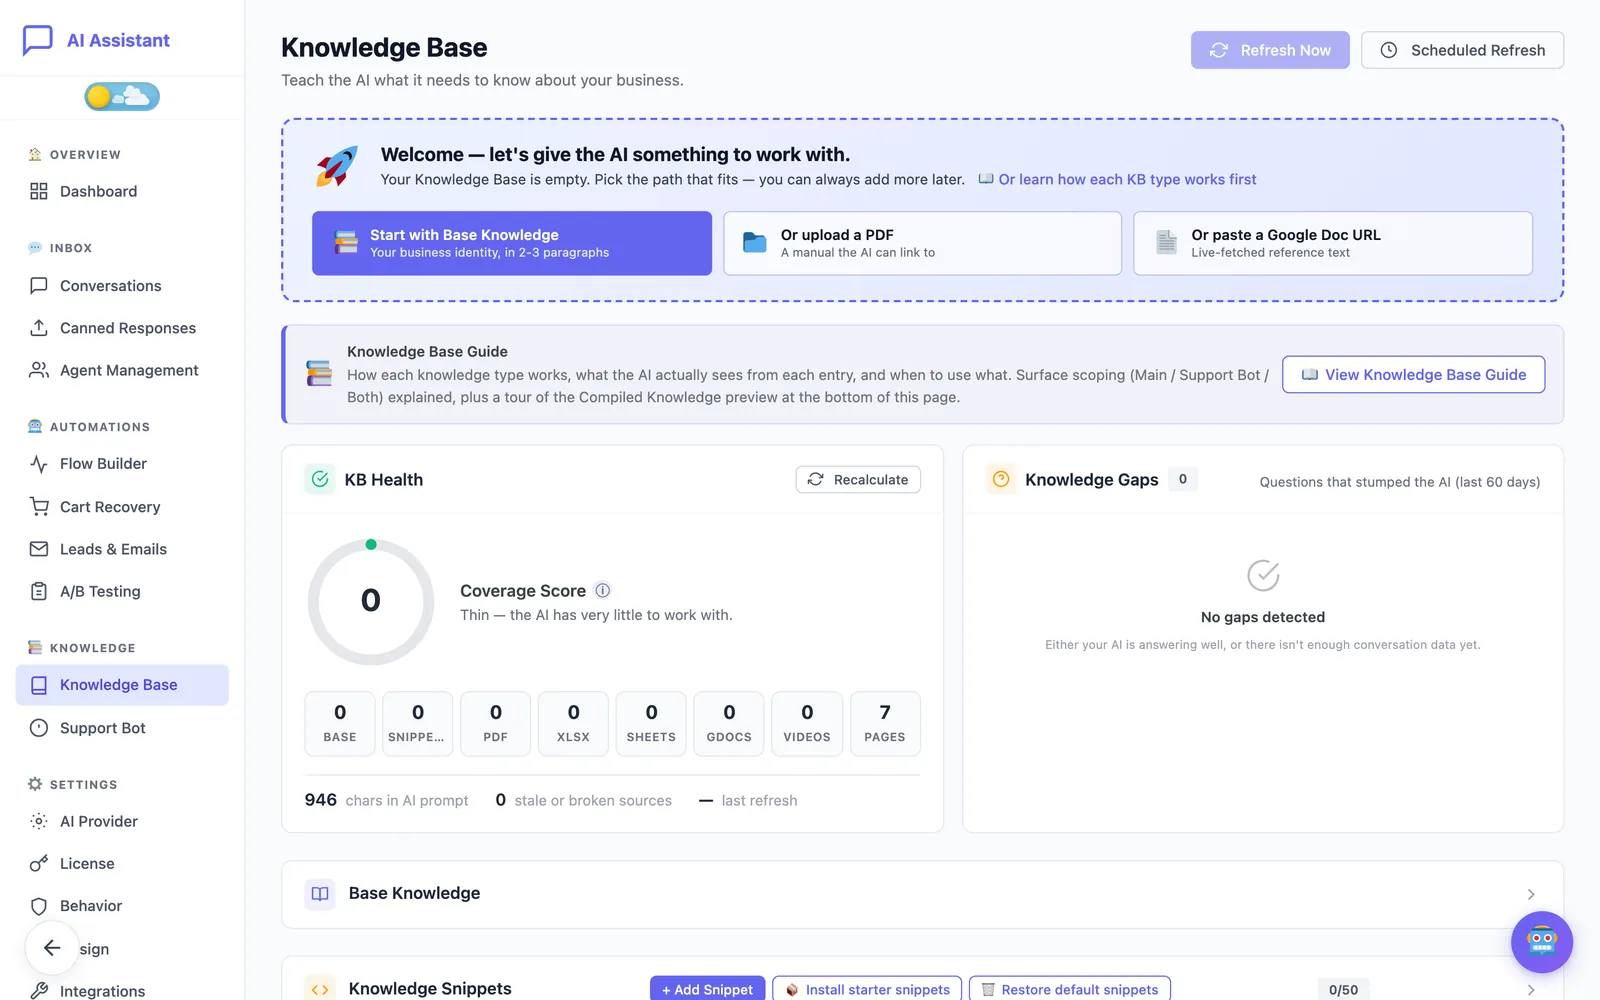
Open Knowledge → Knowledge Base and fill in the Base Knowledge box with two or three paragraphs:
- who you are and what you sell;
- delivery countries, times and costs;
- your returns and warranty policy;
- how customers can reach a person.
Write it as you would explain it to a new employee. The chatbot answers from this text, so anything that is not there, it will not know.
On the free plan you can then add up to 5 snippets (short answers to specific questions), 5 pages of your site, and one document of each type, such as a PDF of your returns form. With WooCommerce active, the chatbot also reads your product catalogue automatically: you do not need to copy product details into the knowledge base.
Step 5: match it to your brand
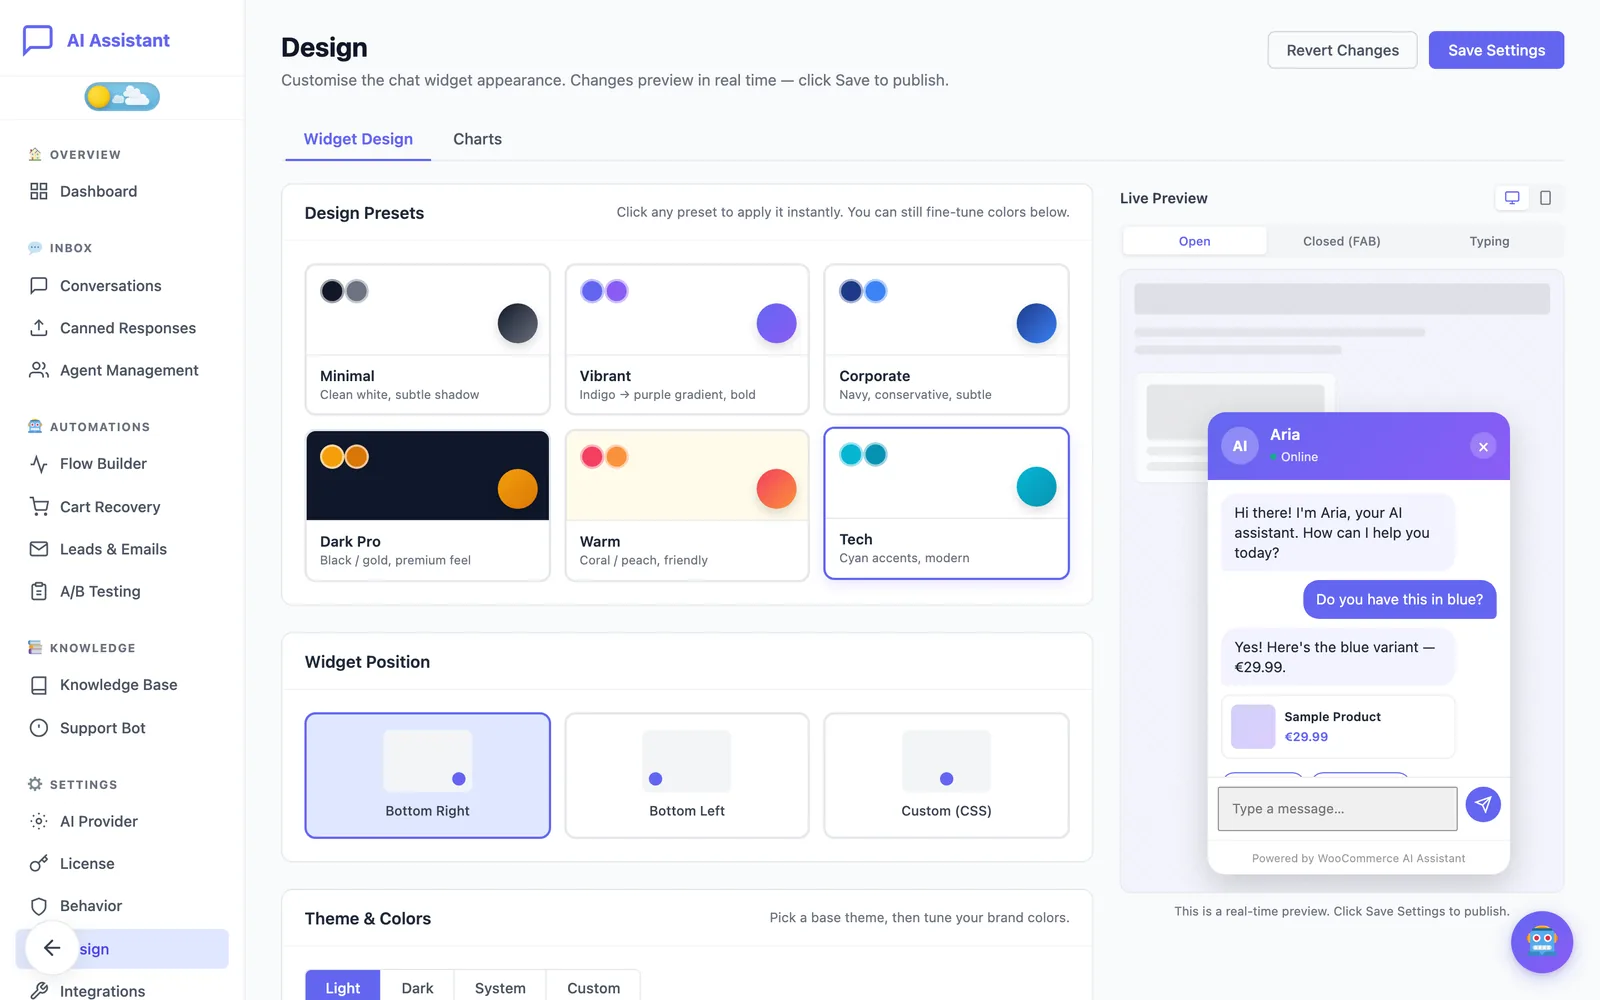
Open Settings → Design, pick a preset and adjust the colours and position of the chat bubble. A live preview shows every change before you save.
Step 6: test it like a customer
- Open your shop in a private window. The widget is hidden from logged-in administrators, so you will not see it in the browser where you manage WordPress.
- Click the chat bubble and ask something your knowledge base covers: “Can I return a product after 20 days?”
- Ask about a product: “Do you have this in a larger size?”
- Go back to Inbox → Conversations in the admin and read the conversation you just had.
If an answer is wrong or vague, the fix is almost always in the knowledge base: add the missing fact and ask again.
Five mistakes to avoid
- An empty knowledge base. Without it, the chatbot can only say generic things. Ten minutes of writing in step 4 is the best investment you can make.
- Testing while logged in as admin. The widget is hidden for you; use a private window.
- Hiding the human option. Customers trust a chatbot more when they know they can reach a person. Keep escalation switched on.
- Promising what the shop does not do. If you do not ship outside the EU, say so in the knowledge base, or the chatbot may guess.
- Never reading the conversations. The inbox shows exactly what customers ask. Each question the chatbot could not answer is a line to add to your knowledge base, and sometimes a hint about what is missing from your product pages.
When to consider Pro
The free plugin gives you a working assistant: product answers, order lookup, a knowledge base and the ability to take over a conversation yourself, with no limit on conversations. Pro adds the features that turn the chat into a sales tool: abandoned cart recovery with controlled discounts, a team of agents with schedules, a visual flow builder, A/B testing and a choice of nine AI providers with automatic fallback.
Start with the free version, read a week of conversations, and decide from there.